creating a healthy and energy-efficient living environment. Concrete is a highly porous material that can absorb and retain moisture. It can lead to various issues, such as mold growth, musty odors, and concrete deterioration. To prevent these issues, installing a vapor barrier that acts as a protective layer between the concrete and the surrounding environment is crucial. Let’s explore the ultimate guide on how to install a vapor barrier on the concrete floor.
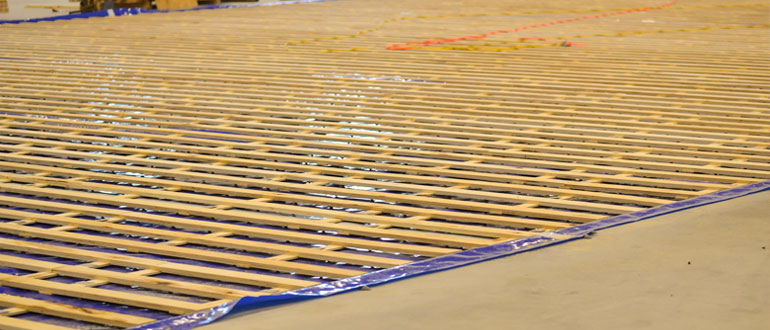
A vapor barrier is a material that blocks moisture from passing through it. It’s usually made of plastic and installed on the concrete slab before installing flooring or other finishing materials. The vapor barrier acts as a barrier that prevents moisture from entering the space above the concrete, which helps to create a healthier and more comfortable living environment.
This article will explore the benefits of installing a vapor barrier on a concrete floor, the types of vapor barriers available, and the steps involved in installing them. By the end of this article, you’ll better understand how to protect your concrete floors and create a healthier living environment for you and your family.
Preparing the area
Before installing a vapor barrier on a concrete floor, it’s important to prepare the area properly to ensure that the installation process goes smoothly and the barrier is effective. Here are the steps involved in preparing the area for a vapor barrier installation.
- Clean the concrete floor: The concrete floor must be clean and free of debris before installing the vapor barrier. Sweep or vacuum the area to remove any dust, dirt, or debris.
- Repair any cracks: Check the concrete for any cracks or damage and repair them before installing the vapor barrier. Use a concrete patching compound to fill in the cracks and smooth out the surface.
- Level the floor: If the concrete floor is not level, use a self-leveling compound to even it out. This will ensure that the vapor barrier is installed evenly and does not have any gaps or wrinkles.
- Check for moisture: Before installing the vapor barrier, it’s important to check the moisture level of the concrete. Use a moisture meter to test the concrete’s moisture content. If the moisture level is too high, the vapor barrier may not be effective, and you may need to take additional steps to mitigate moisture.
- Install a perimeter barrier: Install a perimeter barrier around the edges of the room to prevent moisture from seeping in from the sides. This can be done using a sealant or a foam insulation board.
By following these steps, you can ensure the area properly prepares for installing a vapor barrier. It will help to create a moisture-resistant and energy-efficient environment in your home or building.
Gathering the necessary tools and supplies
Before installing a vapor barrier on a concrete floor, you will need to gather the necessary tools and supplies. Here is a list of items that you may need for the installation.
- Vapor barrier material: The type of vapor barrier material you choose will depend on the specific needs of your project. Common materials include polyethylene sheets, rubberized asphalt, and epoxy coatings.
- Tape: You will need tape to seal the seams of the vapor barrier material. Use a high-quality tape that is designed for use with vapor barriers.
- Utility knife or scissors: You will need a utility knife or scissors to cut the vapor barrier material to size.
- Measuring tape: Use a measuring tape to measure the area where the vapor barrier will be installed.
- Marker or pencil: Use a marker or pencil to mark the areas where the vapor barrier will be cut.
- Knee pads: Installing a vapor barrier on a concrete floor can be a physically demanding task, so it’s important to protect your knees with knee pads.
- Safety glasses: Wear safety glasses to protect your eyes from any debris that may be kicked up during the installation process.
- Gloves: Wear gloves to protect your hands from any sharp edges on the vapor barrier material.
- Dust mask: Wear a dust mask to protect your lungs from any dust or debris that may be kicked up during the installation process.
By gathering these tools and supplies before starting the installation process, you can ensure that you have everything you need to complete the job efficiently and effectively.
The best way to install a vapor barrier on the concrete floor
Installing a vapor barrier on a concrete floor involves several steps. Here is the best way to install a vapor barrier on a concrete floor.
- Measure and cut the vapor barrier: Measure the area where the vapor barrier will be installed, and cut the vapor barrier material to size using a utility knife or scissors. Please leave some extra fabric around the edges to ensure it can be properly sealed.
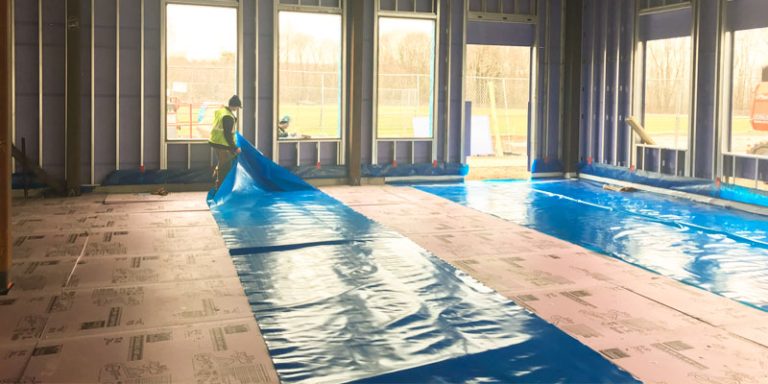
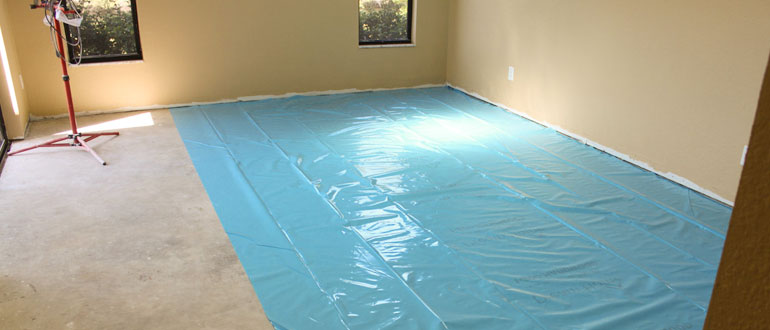
- Lay out the vapor barrier: Lay out the vapor barrier material on the concrete floor, ensuring that it is flat and free of wrinkles or folds. If any wrinkles or folds exist, smooth them out with your hands or a broom.
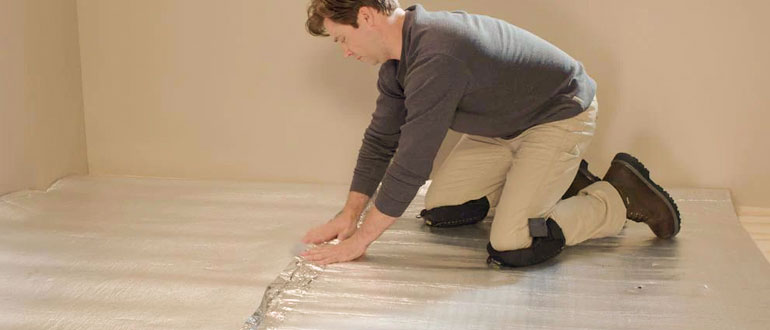
- Seal the seams: Use high-quality tape to seal the seams of the vapor barrier material. The seams should overlap by at least 6 inches, and the tape should be applied to both sides of the seam.
- Trim excess material: Use a utility knife or scissors to trim any extra vapor barrier material from the room’s edges.
- Install flooring or other finishing materials: Once the vapor barrier is installed, you can install the flooring or other materials.
- Inspect the vapor barrier: After the installation is complete, inspect the vapor barrier for any gaps or tears. If you find any, seal them with tape or another appropriate material.
It’s important to note that the specific steps involved in installing a vapor barrier may vary depending on the type of material you are using and the particular needs of your project. Properly installing a vapor barrier on a concrete floor can help protect your home or building from moisture-related damage and create a healthier, more energy-efficient living environment.
Install a vapor barrier without professional help
Here is a step-by-step guide on installing a vapor barrier on a concrete floor.
- Prepare the area: Clean the concrete floor and repair any cracks or damage. Level the floor with a self-leveling compound, if necessary.
- Measure and cut the vapor barrier: Measure the area where the vapor barrier will be installed, and cut the vapor barrier material to size using a utility knife or scissors.
- Lay out the vapor barrier: Lay out the vapor barrier material on the concrete floor, ensuring that it is flat and free of wrinkles or folds. If there are any wrinkles or folds, smooth them out with your hands or a broom.
- Seal the seams: Use high-quality tape to seal the seams of the vapor barrier material. The seams should overlap by at least 6 inches, and the tape should be applied to both sides of the seam.
- Trim excess material: Use a utility knife or scissors to trim any excess vapor barrier material from the edges of the room.
- Install flooring or other finishing materials: Once the vapor barrier is installed, you can install the flooring or other finishing materials on top of it.
- Inspect the vapor barrier: After the installation is complete, inspect the vapor barrier for any gaps or tears. If you find any, seal them with tape or another appropriate material.
While installing a vapor barrier on a concrete floor can be done without professional help, it’s important to note that it can be physically demanding, especially if the area is large. It’s also essential to follow the manufacturer’s instructions for the type of vapor barrier material you use. Consult a professional if you have any concerns or questions about the installation process.
Common issues
While installing a vapor barrier on a concrete floor is relatively straightforward, some common issues can arise. Here are some potential problems to watch out for.
- Uneven surface: If the concrete floor is unstable, getting the vapor barrier to lie flat can be challenging. It can lead to wrinkles and folds that can compromise the effectiveness of the barrier. To avoid this issue, use a self-leveling compound to level the floor before installing the vapor barrier.
- Inadequate sealing: The seams of the vapor barrier need to be appropriately sealed to prevent moisture from getting through. If the seams are not sealed adequately, water can seep through and cause damage. Be sure to use high-quality tape to seal the seams, and ensure at least a 6-inch overlap between the pieces of material.
- Tears and punctures: The vapor barrier material can be punctured or torn during installation, compromising its effectiveness. Be careful when handling the material, and use a utility knife or scissors to trim it to size. If you notice any tears or punctures, seal them with tape or another appropriate material.
- Improper installation: Installing a vapor barrier on a concrete floor requires skill and attention to detail. Follow the proper steps to ensure the effectiveness of the barrier maintenance. Be sure to measure and cut the material carefully, lay it out flat, and inspect it for gaps or tears after installation.
By being aware of these common issues and avoiding them, you can ensure that your vapor barrier is installed correctly and effectively. Consulting a professional for guidance may be a good idea if you need help installing a vapor barrier on a concrete floor.
Choose the best vapor barrier factors
When choosing a vapor barrier to install on a concrete floor, there are a few factors to consider.
- Material: Vapor barriers can make from various materials, including polyethylene, polypropylene, and foil. Each material has advantages and disadvantages, so consider the specific needs of your project when choosing a material.
- Thickness: The thickness of the vapor barrier can affect its effectiveness. Thicker materials may provide better protection against moisture but may also be more challenging to work with.
- Permeability: Some vapor barriers are more permeable than others, affecting their ability to block moisture. Consider the level of moisture protection that you need when choosing a vapor barrier with an appropriate permeability rating.
- Durability: A vapor barrier that is not durable enough may tear or puncture during installation or over time, compromising its effectiveness. Choose a material that is strong and durable enough to withstand the demands of your specific project.
- Manufacturer’s recommendations: Be sure to follow the manufacturer’s recommendations for the specific vapor barrier material you choose. They may have specific guidelines for installation, thickness, or other factors that can affect the effectiveness of the barrier.
Ultimately, the best vapor barrier to install on a concrete floor will depend on the specific needs of your project. When deciding, consider factors such as material, thickness, permeability, durability, and manufacturer’s recommendations.
Commonly asked FAQs
What is a vapor barrier, and why do I need one on my concrete floor?
A vapor barrier is a material that is installed between the concrete slab and any flooring material to prevent moisture from seeping through. Moisture can cause damage to flooring, insulation, and other materials, so a vapor barrier is essential for protecting your home or building.
What materials can be used for a vapor barrier?
Vapor barriers can be made from various materials, including polyethylene, polypropylene, and foil. Each material has advantages and disadvantages, so choosing the suitable material for your project is essential.
How do I prepare my concrete floor for a vapor barrier?
To prepare your concrete floor for a vapor barrier, you’ll need to clean and dry the surface thoroughly. You may also need to level the surface using a self-leveling compound.
How do I install a vapor barrier on a concrete floor?
To install a vapor barrier on a concrete floor, you’ll need to measure and cut the material to size, lay it out flat, and tape the seams together. You may also need to tape the edges of the material to the walls or other vertical surfaces.
Can I install a vapor barrier myself, or do I need to hire a professional?
Installing a vapor barrier on a concrete floor is a relatively straightforward process. That a DIYer can do with some essential tools and skills. However, suppose you need clarification on any aspect of the installation process or are dealing with a particularly complex or large space. In that case, hiring a professional may be a good idea to ensure the job is done correctly.
By understanding these common questions and concerns about installing a vapor barrier on a concrete floor, you can ensure that you take the proper steps to protect your home or building from moisture damage.
Conclusion
Installing a vapor barrier on a concrete floor is essential in protecting your home or building from moisture damage. Following the steps outlined in our guide, you can install a vapor barrier on your concrete floor confidently.
Remember to gather all the necessary tools and supplies, prepare the area thoroughly. Subsequently, choose a vapor barrier material that meets your specific needs. With a properly installed vapor barrier. You can enjoy peace of mind knowing that your home or building will protect from moisture damage for years to come. If you have any questions or concerns about the installation process, don’t hesitate to consult with a professional for guidance.
You May Also like to read:


