Levelling a wooden floor in an old house is essential in maintaining the home’s structural integrity and aesthetic appeal. Not only does it improve the overall look and feel of the space, but it also prevents potential safety hazards and increases the property’s value. Don’t worry, let’s explore how to level a wooden floor in an old house with the proper guidance and essential techniques.
In this guide, we will walk you through the step-by-step process of levelling a wooden floor in an old house. We’ll cover everything from assessing the extent of the problem to implementing the most effective solutions. Whether you’re a seasoned DIY enthusiast or a beginner taking on your first home renovation project, this comprehensive guide will provide you with the knowledge and confidence to tackle the task at hand.
Preparing the Floor to Level a Wooden Floor in an Old House
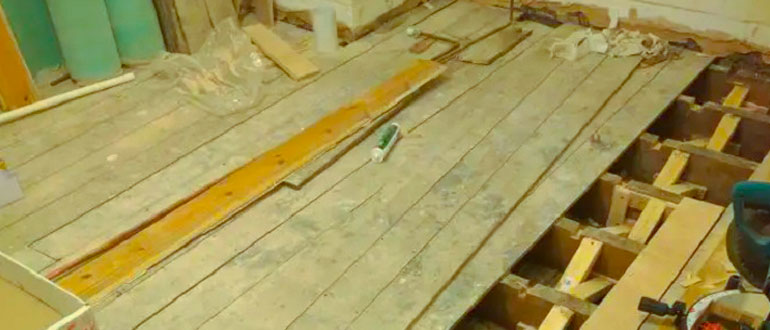
The preparation phase is the first step in levelling a wooden floor in an old house. This includes removing any old flooring, such as carpet, tile, or linoleum, and any debris that may be present. This process can be time-consuming, but it’s vital to ensure that the subfloor is clean and clear of debris or old adhesive before proceeding.
Once the old flooring and debris have been removed. It’s time to inspect the subfloor for any damage. This includes checking for rot, water damage, or other structural issues that may need to be addressed. Should make any necessary repairs at this time. The subfloor should be cleaned and smoothed before levelling. You can do this with a wire brush or a floor scraper; any dust or debris should be vacuumed or swept away.
It’s essential to take the time to properly prepare the subfloor, as this will ensure a smooth and successful levelling process. By removing old flooring, inspecting and making necessary repairs, and cleaning the subfloor, you are setting the foundation for a beautiful and level new floor.
Measuring and Marking the Floor
Measuring and levelling the subfloor is the next step in levelling a wooden floor in an old house. An essential tool for this step is a laser level or spirit level. A laser level projects a level line across the floor, making it easy to see any dips or uneven areas. A spirit level is a hand-held tool that allows you to measure the levelness of the bed by comparing it to a bubble in a liquid-filled vial.
Once you have identified any uneven areas, it’s time to begin shimming or adding a self-levelling compound. Shimming is the process of inserting small pieces of wood or other materials between the subfloor and the joists to raise the level of the subfloor. The self-levelling compound is a type of cement-based product that is used to level the subfloor. It is poured onto the subfloor and spread evenly with a trowel.
It’s essential to check and adjust the subfloor level as necessary, mainly when using a self-levelling compound. Check the subfloor for level using a laser level or spirit level, and should fill any low areas with a different mixture. Before proceeding, the mix should dry and cure according to the manufacturer’s instructions.
By measuring and levelling the subfloor, you will ensure that the new flooring is installed on a stable surface. This will not only look better, but it will also prolong the life of the new flooring and improve the overall functionality of the space.
Installing New Flooring to Level a Wooden Floor in an Old House
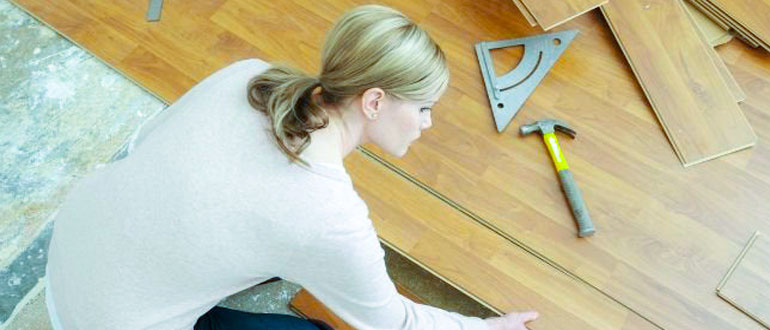
Once the subfloor is levelled correctly, it’s time to install the new flooring. There are several options, such as hardwood, engineered wood, laminate, and more. It’s essential to select a flooring material that is appropriate for the space and your personal preferences.
Before installing the new flooring, measuring the space and cutting the flooring to fit is essential. Should lay out the new flooring in the room and dry-fitted to ensure that it works properly. Once you are satisfied with the fit, you can install the flooring.
The installation process will vary depending on the type of flooring you have selected. Hardwood flooring is typically nailed or glued to the subfloor, while engineered wood and laminate flooring may use a click-lock system for installation. It’s essential to follow the manufacturer’s installation instructions and use the appropriate tools and adhesive.
Installing new flooring is the final step in levelling a wooden floor in an old house. The new flooring will not only improve the appearance of the space but also provide a stable and durable surface for years to come. It’s essential to take the time to select the right flooring and ensure proper installation, as this will help ensure the new floor’s longevity.
Finishing and Maintenance to Level a Wooden Floor in an Old House
After the new flooring is installed, the final step is to finish and maintain it. Completing the new flooring will enhance its appearance and protect it from wear and tear. This may include sanding, staining, and applying a protective finish or sealer.
Sanding the new flooring is done to smooth out any rough spots or roughness left after installation. It is done to make the surface of the floor even and smooth before applying a finish or a sealer. If you have chosen a hardwood floor, it is essential to choose a stain that matches the colour of the flooring and the room’s decor.
Once the new flooring is sanded, stained, and finished, it’s essential to maintain it to ensure its longevity. This includes regular cleaning and protecting it from scratches and dents. It’s necessary to use the appropriate cleaning products, such as a pH-neutral cleaner, and to avoid harsh chemicals or abrasive materials. It’s also essential to protect the flooring from scratches and dents by using furniture pads and protecting it from heavy foot traffic.
Proper maintenance is the key to keeping your new flooring looking beautiful for years to come. By finishing and maintaining the new flooring, you will ensure that it retains its beauty and durability. This will not only improve the appearance of the space but also increase the property’s value.
Level a badly unlevel floor for Wooden Floor in an Old House
There are several ways to level a badly unlevel floor, including:
- Using self-levelling compound: This cement-based mixture can be poured over the existing floor to create a new, level surface.
- Shimming: This involves adding small pieces of wood or other materials to the low areas of the floor to bring them up to the same level as the rest of the floor.
- Grinding: This involves using a concrete grinder to remove the high areas of the floor and bring them down to the same level as the low areas.
- Making mosaic: Injecting a slurry mixture of cement and soil into the voids under the slab to lift and level the slab.
Level floor joists in old houses
Levelling floor joists in an old house can be challenging, but it is essential to ensure the structural integrity and stability of the home. The process typically involves identifying and shoring up any sagging or damaged joists and reinforcing or replacing them as necessary. Here is a general guide on how to level floor joists in an old house:
- Identify the problem: Inspect the floor for any signs of sagging or bounciness, and use a level to check for unevenness. Look for any signs of rot or termite damage in the joists.
- Access the joists: Depending on the location of the problem. You may need to access the joists from below (e.g. crawl space or basement) or above (e.g. by cutting a hole in the floor).
- Shoring up sagging joists: If the joists are sagging but still in good condition. You can use temporary supports (such as jacks) to lift and level them. You can do this by placing the jack at the low end of the joist and slowly raising it until it is level.
- Reinforcing or replacing damaged joists: If the joists are damaged or rotting, they will need to be reinforced or replaced. Sistering new joists can do alongside the old ones or installing a joist hanger to support the existing ones.
- Finishing the repair: Once the joists have been levelled, reinforced, or replaced. Then we should install a new subfloor and any necessary flooring materials.
It’s vital to hire a professional if you are not comfortable with the process, as it is a critical part of the house structure, and mistakes can have serious consequences.
FAQs
How do I know if my wooden floor needs levelling?
It may require levelling if you notice any uneven areas, creaking, or bounciness on your floor. You can also check for levelness using a laser level or spirit level.
What tools do I need to level a wooden floor?
The main tools you will need to level a wooden floor. Include a laser level or spirit level, a saw, a hammer, nails or adhesive, and shims or self-levelling compound.
Can I level a wooden floor myself, or should I hire a professional?
While levelling a wooden floor is not difficult, it requires some know-how and the right tools. If you are comfortable with DIY projects, you can level your wooden floor yourself. However, it is best to hire a professional if you are unsure or have any concerns.
What kind of flooring can I install after levelling a wooden floor?
After levelling a wooden floor. Furthermore, you can install various flooring materials such as hardwood, engineered wood, laminate, tile, carpet, or linoleum.
Conclusion
In conclusion, Levelling a wooden floor in an old house is a task that requires careful planning, and precision. Throughout this process, you may have encountered challenges and made adjustments to suit your specific circumstances. By overcoming these obstacles, you have not improved the functionality and safety of your home. Furthermore, gained valuable skills and knowledge in the realm of home improvement.
Remember that maintenance and regular inspections will be key to preserving the levelness of your newly levelled wooden floor. Keep an eye out for signs of wear and tear, and address any issues promptly. And take proactive measures to prevent future problems. This will ensure the longevity and durability of your floors, allowing you to enjoy them for years to come.


